All Activity
- Past hour
-

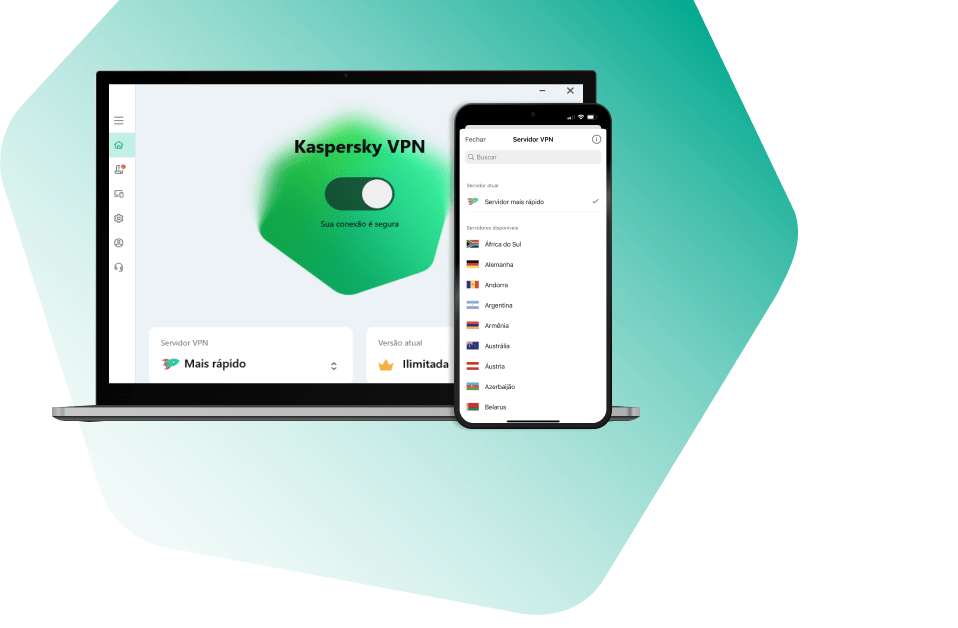
В KSeC доступна только одна локация
MasterKarabas replied to Zaurbek's topic in Kaspersky Secure Connection
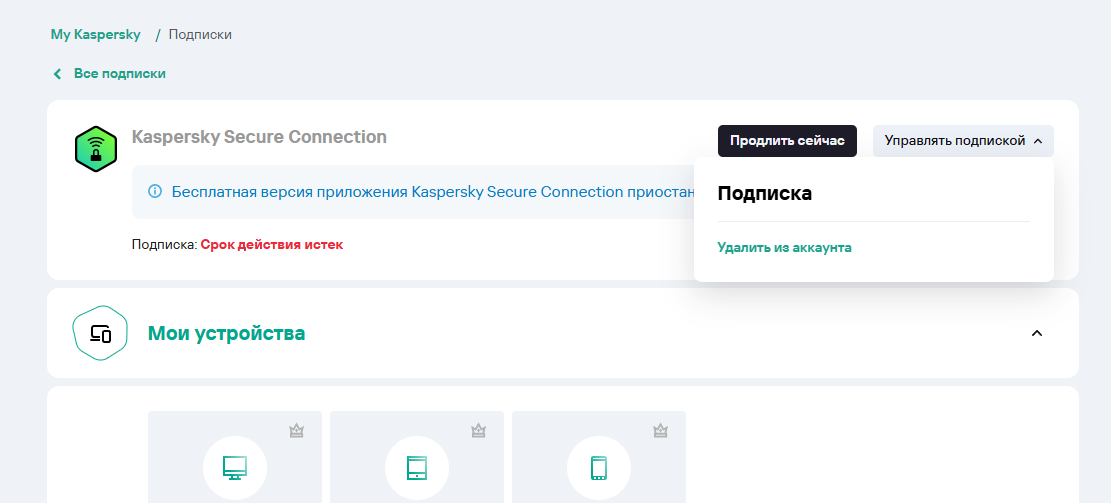
Покажите, пожалуйста французской бабушке где можно отключить автопродление? -

"Search-sprint.com" malware virus
Dinesh replied to Dinesh's topic in Virus and Ransomware related questions
Thanks for the info. I tried that but the problem is still there. I removed chrome and reinstalled with the same problem. Also amended the start up but it wont work. Attached screen shot. Further to above i have rescanned and restarted but the problem is still there. did the process again and found that there is 2 items that cannot be deleted. I attach screen shot I have done the scan with all application off. un installed Bing desktop application Those 2 items cannot be deleted. I have tried to quarantine them but...... when i rescan it is still there. Also attach a page for when i click on the chrome tab. Note it says "untitled" in the top LHS of the window. I have disabled microsft Sync and reset Network ... have not solved the problem.
-

В KSeC доступна только одна локация
kmscom replied to Zaurbek's topic in Kaspersky Secure Connection
он по кругу гоняет ))) вдруг на измор получится нуда ))) там же и управление подпиской есть -
В KSeC доступна только одна локация
MasterKarabas replied to Zaurbek's topic in Kaspersky Secure Connection
А это я так понимаю меню управления подпиской ))
-

В KSeC доступна только одна локация
andrew75 replied to Zaurbek's topic in Kaspersky Secure Connection
Ну так у вас же действительно автопродление, если пытались списать деньги за продление. Значит нужно отключить автопродление предварительно. Там же ровно это и написано. -
В KSeC доступна только одна локация
MasterKarabas replied to Zaurbek's topic in Kaspersky Secure Connection
-
В KSeC доступна только одна локация
andrew75 replied to Zaurbek's topic in Kaspersky Secure Connection
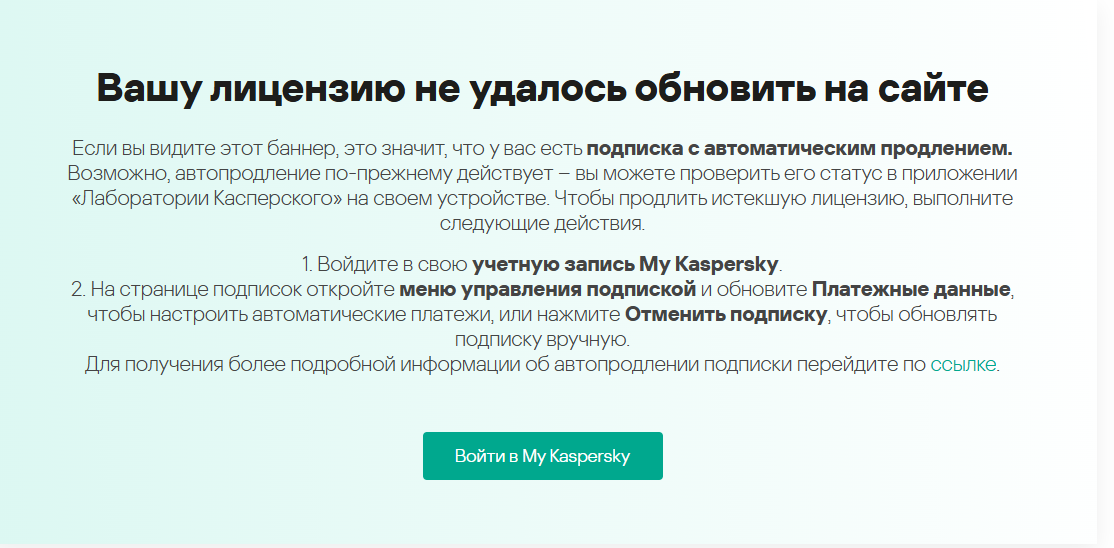
а что говорит? Если отсюда попробовать? - https://www.kaspersky.ru/renewal-center/home -
 ZhurakoFF joined the community
 -
В KSeC доступна только одна локация
MasterKarabas replied to Zaurbek's topic in Kaspersky Secure Connection
Во-первых, не дает он продлить подписку. Кнопка есть, а продлевать не дает. Во-вторых продукт под тем же именем. Называйте его тогда уж Lite То что сейчас делает Касперский это как в свое время продажа жигулей за те же деньги, но уже без подушек безопасности. Только тоб этом все же предупреждали заранее. Проходили. Аргументация конечно хороша ))) -
скриншот окна с сообщением об ошибке покажите иначе сейчас начнется перебор всех вариантов по возможным причинам )))
-
Убедитесь что приложение находится в группе "Доверенные". Настройка - Настройки безопасности - Предотвращение вторжений - Управление приложениями.
-

"Search-sprint.com" malware virus
harlan4096 replied to Dinesh's topic in Virus and Ransomware related questions
Check in Your Windows Control Panel -> Programs and features, if suspicious apps installed. Also, do You have Synchronization enabled in Chrome? If so, disable it. Apply these steps to reset Your Windows Network settings: https://windowsreport.com/reset-network-settings-windows-10/ -
"Search-sprint.com" malware virus
Dinesh replied to Dinesh's topic in Virus and Ransomware related questions
Thanks for the info. I tried that but the problem is still there. I removed chrome and reinstalled with the same problem. Also amended the start up but it wont work. Attached screen shot. Further to above i have rescanned and restarted but the problem is still there. did the process again and found that there is 2 items that cannot be deleted. I attach screen shot I have done the scan with all application off. un installed Bing desktop application Those 2 items cannot be deleted. I have tried to quarantine them but...... when i rescan it is still there. Also attach a page for when i click on the chrome tab. Note it says "untitled" in the top LHS of the window.
-

В KSeC доступна только одна локация
AlexeyK replied to Zaurbek's topic in Kaspersky Secure Connection
Ну а что, теперь программой стало пользоваться еще проще и комфортнее. Все еще мучаетесь с выбором локаций? Тогда мы идем к вам. Всего одна кнопка вкл/выкл и никаких заморочек.) -

How to modify KES incompatible software list
Egor Erastov posted a blog entry in Kaspersky Endpoint Security's KES for Windows
Advice and Solutions (Community Knowledgebase) Disclaimer. Read before using materials. In case you want to skip automatic uninstallation of a specific software, but do not want to disable incompatible software check completely, you may edit cleaner.cab. Step-by-step guide Download full KES distributive Start it and make sure all files were unpacked Navigate to the directory you unpacked kes_win.msi to Find cleaner.cab in case of KES11.9 and older versions. Find cleaner_v2.cab in case of KES 11.10 and more recent versions Unpack the contents to the temporary directory c:\temp\cleaner_v2 or c:\temp\cleaner Search for a 3d party product (for example, Bitdefender) to be removed from KES install package by running this command: findstr /C:"Bitdefender Endpoint Security Tools" C:\temp\cleaner_v2\*.ini It will display the exact name of ini file destined to remove Bitdefender Endpoint Security Tools: C:\temp\cleaner_v2\2dd68715-037d-4c3d-bb5e-e07f07bcb357.ini:name=Bitdefender Endpoint Security Tools 6 x64 Open the the contents of 2dd68715-037d-4c3d-bb5e-e07f07bcb357.ini for more details about 3d party product in question. If everything is ok, delete the ini file Find cleanapi.ini Find and remove all lines related to the products you removed on step 8 (several 3d party products can be removed): [bitdefender_endp_sec_tools_6_2_15_x64] file=2dd68715-037d-4c3d-bb5e-e07f07bcb357.ini Antivirus=1 Product=KES 11. Pack all the remaining files to cleaner.cab in case of KES 11.9 and older, cleaner_v2.cab in case of KES 11.10 and more recent version You may now use this custom file instead of the standard one. Place it near setup.exe or *.kud\*.kpd and re-create a new package in KSC console. Packing files back to *.cab file may be difficult if you do not have specific software. Below you can find two scripts: one for command prompt, one for powershell. Command prompt Run command prompt script from the directory with *.ini files. In case of KES11.10 and more recent: @echo off dir /s /b /a-d >files.txt makecab /d "CabinetName1=cleaner_v2.cab" /d "MaxDiskSize=0" /f files.txt del /q /f files.txt, setup.inf, setup.rpt In case of KES 11.9 and older: @echo off dir /s /b /a-d >files.txt makecab /d "CabinetName1=cleaner.cab" /d "MaxDiskSize=0" /f files.txt del /q /f files.txt, setup.inf, setup.rpt Please be advised that cab file will be saved to the disk1 subfolder inside the folder with ini files. Powershell Powershell script syntax is: compress-directory "PATH_TO_INI" function compress-directory([string]$dir) { $ddf = ".OPTION EXPLICIT .Set CabinetNameTemplate=cleaner.cab .Set DiskDirectory1=. .Set CompressionType=MSZIP .Set Cabinet=on .Set Compress=on .Set CabinetFileCountThreshold=0 .Set FolderFileCountThreshold=0 .Set FolderSizeThreshold=0 .Set MaxCabinetSize=0 .Set MaxDiskFileCount=0 .Set MaxDiskSize=0 " $dirfullname = (get-item $dir).fullname $ddfpath = ($env:TEMP+"\temp.ddf") $ddf += (ls -recurse $dir | ? {!$_.psiscontainer}|select -expand fullname|%{'"'+$_+'" "'+$_.SubString($dirfullname.length+1)+'"'}) -join "`r`n" $ddf $ddf | Out-File -encoding UTF8 $ddfpath makecab /F $ddfpath rm $ddfpath rm setup.inf rm setup.rpt } - Today
-
 Brutal Monkey joined the community
 -

В KSeC доступна только одна локация
Friend replied to Zaurbek's topic in Kaspersky Secure Connection
Выше писал, что по моей рекомендации и эти люди видели, как программа работала на моем устройстве, а не просто так решили купить. -
мой антивирус касперского блокирует вход на платформу игры в battle.net, как мне добавить его в исключения чтобы он работал? соединение не проходит выдает ошибку через интернет
-
В KSeC доступна только одна локация
AlexeyK replied to Zaurbek's topic in Kaspersky Secure Connection
Ну правильно: "...необходимую и достоверную информацию о товарах (работах, услугах), обеспечивающую возможность их правильного выбора". Представленная информация никак не обеспечит возможность правильного выбора. Я почти уверен: получив всю информацию о текущем состоянии сервиса покупатель не сделает выбор в его пользу. Потому этой информации и нет. -
How to use FDE Precheck utility
Egor Erastov posted a blog entry in Kaspersky Endpoint Security's KES for Windows
Advice and Solutions (Community Knowledgebase) Disclaimer. Read before using materials. This article is about Kaspersky Endpoint Security for Windows (KES for Windows) Description FDE precheck is a utility used for advanced Full Disk Encryption compatibility testing. It contains latest drivers which will be implemented in future KES releases. FDE precheck also collects diagnostic data used to fix compatibility issues. Inability to use laptop keyboard and\or touch-pad is one of the most frequently met issues. Using FDE precheck you can understand if compatibility issue was already fixed and will be included in next release or it should be addressed. You can download latest FDE precheck utility using following links: For KES 12+ - https://support.kaspersky.com/14328 System requirements Single operating system should be installed on the test machine, FDE Precheck can't properly function on a host with multiple operating systems. Use administrative account to run the utility. Read before proceeding Decrypt the test host and remove Kaspersky Endpoint Security and AES module. Do a backup of the critical data on the test machine. Follow the test sequence exactly as stated below. Do not manually stop the execution of the utility. The system will automatically restart several times, it is an expected behavior. Plug in laptop. Do not run test on battery. Failure to comply with steps above may lead to unpredictable consequences. Test sequence Make sure machine decrypted does not have KES or AES module installed not running any KL drivers has no critical data plugged in Reboot. Copy and unpack fde_precheck.zip archive. Run elevated fde_precheck.exe (either by right-clicking and choosing Run as administrator or by starting it from an elevated command prompt). If the program will not find any incompatibilities the following message box will appear: Press Yes, to initiate installation of the encryption drivers and initiation of the test. Wait for the automatic reboot, then login using the administrative user as was done earlier. Press OK on the pop-up that will appear shortly after the reboot: Press Yes in the UAC window if it will appear shortly after. Wait for several minutes (up to 10-15 minutes) until next automatic reboot will occur. Do not initiate reboot manually! It will be done automatically. Manual reboot at this stage may result in corruption of the OS. All preparations are run in background, it is normal that there will be no indication of activity on the desktop. After automatic reboot you will see the preboot agent, and it will require human presence to complete those tests. If possible, record the whole process on a camera of smartphone. You will be asked to enter random keystrokes using the keyboard and mouse. In case of successful keystroke registration you will see something like that: Just follow the instructions that will appear on the screen and press "NEXT >" when done with each test. In case FDE Precheck Preboot agent will fail booting or will freeze at some point, please take photo of the error message, or record the whole process on a camera and reboot the machine if necessary. OS will boot either way. Login using the administrative account that was used earlier. At this point drivers will be removed in the background and host will be rebooted one last time automatically. Wait for several minutes (up to 10-15 minutes) until next automatic reboot will occur. Do not initiate reboot manually! It will be done automatically. Manual reboot at this stage may result in corruption of the OS. All preparations are run in background, it is normal that there will be no indication of activity on desktop. The following three files are always created. All three files are mandatory to provide for analysis. fde_precheck_report.txt fde_precheck.log (will be located in the folder with fde_precheck.exe) Description of what have happened during tests (with screenshots and video if possible). -
 Xalk joined the community
 -
Advice and Solutions (Community Knowledgebase) Disclaimer. Read before using materials.
Egor Erastov posted a blog entry in Kaspersky Endpoint Security's KES for Windows
The materials provided on the Advice and Solutions (Community Knowledgebase) part of the Forum result from the work of the Kaspersky Customer Support team and Forum community members. They are shared here for ease of use of Kaspersky products, deploying and configuring them. Please remember that using commands or recommendations from the articles without a clear understanding of their purpose may result in errors or system inoperability. Please note that some materials presented are not official, so technical support may decline to support a specific unsupported configuration in some instances. Please also ensure to use the official documentation, found in this link. -
В KSeC доступна только одна локация
AlexeyK replied to Zaurbek's topic in Kaspersky Secure Connection
Всегда такие платные программы предлагают выбор. Ограничение в 1 локацию - удел бесплатных версий, да и то там обычно их несколько. Это всеобщее представление, об этом я уже выше говорил. Если было так, а теперь эдак - почему об этом прямо и большими буквами не указать на странице продажи? И вопросов ни у кого не возникнет, если это будет перечислено как одно из несомненных преимуществ продукта. Вот он такой особенный - не как все. -
В KSeC доступна только одна локация
andrew75 replied to Zaurbek's topic in Kaspersky Secure Connection
Вроде статью 10-ю Закона о защите прав потребителей никто не отменял ) -
В KSeC доступна только одна локация
kmscom replied to Zaurbek's topic in Kaspersky Secure Connection
вы говорите про сюрприз со знанием прошлого. что было так, а теперь так. нет никакого сюрприза, вы купили продукт, и он такой какой есть. если вы его будете сравнивать с чем то - то только тогда можно говорить о сюрпризах, плохих или хороших -
KUMA: How to import assets exported from KSC CC to KUMA using API
Egor Erastov posted a blog entry in Kaspersky Unified Monitoring and Analysis Platform's Advice and Slutions
Description When we use Kaspersky Security Center Cloud Console (KSC CC), we cannot directly integrate KUMA with the KSC Server for collecting the asset information. In this article, we will look at the steps to import assets from KSC CC. Steps – plan Assets/Devices to be exported from the KSC CC. Before exporting the data, make sure to select the columns: Name, IP Address, Domain, DNS domain, DNS name, IPV6 Address, and Operating System. Create an API token with the required access rights from KUMA Web interface. Modify the attached script with the IP address, API port, tenant ID, and API token. Copy files to the KUMA server and execute the script. Verify the assets in the KUMA WebUI. Steps - detailed 1. Exporting the Assets from the KSC CC Login to your account at KSC CC and open your workspace. Navigate to Assets (Devices) → Managed Devices. Press on a gear icon to open a list of the displayed columns: Press Select all or select these columns: Name; Operating System; IP address; Domain; DNS domain; DNS name; IPV6 address. Select all devices and click Export to CSV. Copy the downloaded CSV file to the KUMA server. Rename the file, if required. 2. Creating an API token from KUMA WebUI Login to your KUMA Core server. Navigate to Settings → Users. In the right part of the Settings section, Users will be displayed. Select the relevant user and click the API access rights button in the details area that opens on the right. Select/Clear the check box for the required operation. Alternatively, you can select all operations. Click on Generate token button in details area. A New token window opens. If necessary, set the token expiration date or select the No expiration date check box. Click Generate token, copy the generated token and save in a file. If you did not copy the token before closing the window, you will have to generate a new token. Click Save. 3. Getting information about Tenant ID Login to your KUMA Core server. Navigate to Settings → Tenants. Click on Export with All fields. Open the exported file named tenants.csv and take a note of the value for Main tenant. 4. Modifying the script 1. Download the attached file: assets_import.py 2. Modify these lines: FILE_PATH = Put the path of the file CSV file from the KUMA server. TOKEN = Token generated from above section (Create API Token from KUMA WebUI). ADDRESS = IP Address/Hostname of the KUMA server. PORT = 7223, This is the API port in Standalone KUMA. TENANT_ID = Tenant ID exported from the Main Tenant. Don't remove the single quotes ' from the line items, your values of parameters should be within single quotes 'value' 5. Copying files to KUMA and execute the script Connect to your KUMA server using WinSCP Copy the script assets_import.py and export.csv to any directory. From SSH session of KUMA server, navigate to directory with the files and provide execute permissions to the assets_import.py chmod +x assets_import.py Execute the script on the KUMA server with the below command. sudo python3 assets_import.py Verify the results of the command execution. Here is what the successful results look like: 6. Verify the Assets in the KUMA WebUI Login to your KUMA Core server. Navigate to Assets → All Tenants. Click on an Asset and check the details. For example, Asset source: Created manually. Sample Screenshot for the Assets Additional notes for Assets Create categories based on the site name, if the assets need to be grouped by sites in KUMA. Additional criteria can be configured in the condition to move the endpoints based on a hostname/IP address to assign the category; Export the assets group-wise from KSC CC, and then use dedicated scripts to manually assign the endpoints to a category; Rename the files with group name before copying to KUMA server so you can identify them easily; Follow the steps, suggested in this article, to import the assets weekly/monthly basis. New assets will be added to KUMA and existing assets will remain as it is. The assigned category for the existing assets will not be impacted as well. -
No puedo descargar ningun archivo - Virus detectado
harlan4096 replied to DavidGM's topic in Para usuarios particulares
Bienvenido a la Comunidad de Kaspersky. Por favor indica versión de KPremium instalado. Adjunta captura de error que obtienes al descargar. -
"Search-sprint.com" malware virus
harlan4096 replied to Dinesh's topic in Virus and Ransomware related questions
Close all the browsers before running the scan and quarantine. Remove those 2 items also.
.png.50069469be3083b2d715aca019501acb.png)


.png.ed77742b036383dedab343a69a2a5b1f.png)
.png.8d12d2fbc9abf4cdb135998520173e52.png)