

How to upgrade KATA 3.7.2 > 4.0 > 4.1 > 5.0 > 5.1 > 6.0 > 6.1 [KATA/KEDRE]

Entry posted by svc_kms in How-to
332 views
In order to upgrade KATA from 3.7.2 to 4.0 > 4.1 > 5.0 > 5.1 > 6.0 please follow the manual below.
Step-by-step guide
Prior to PCN upgrade you have to disconnect all Sensors, SCNs and Sandboxes.
After upgrade Sandboxes and Sensors must be reinstalled, disconnected SCNs – upgrade to 4.0 and 4.1 and then reconnect them to PCN.
Upgrade order described here - https://support.kaspersky.com/KATA/4.0/en-US/198801.htm
Information which is kept during upgrade - https://support.kaspersky.com/KATA/4.0/en-US/227848.htm
Contents of backup - https://support.kaspersky.com/KATA/4.0/en-US/198854.htm
NB! Events database is not being transferred if you want to restore backup to new installation (e.g. new physical or virtual server).
System requirements are the same for 3.7.2 and 4.0/4.1, so if 3.7.2 installation matches the requirements, you can upgrade keeping the same hardware/VM configuration - https://support.kaspersky.com/KATA/4.0/en-US/194861.htm
For upgrade you don’t need .ktgz archives, only the ISO file.
Pre-upgrade recommendations
Before upgrading KATA 3.7.2 to KATA4, copy and run this script.
Run it as root:
python /var/opt/kaspersky/apt/files/kata4-preupgrade-checker.py
|
Expected result for vanilla 3.7.2:
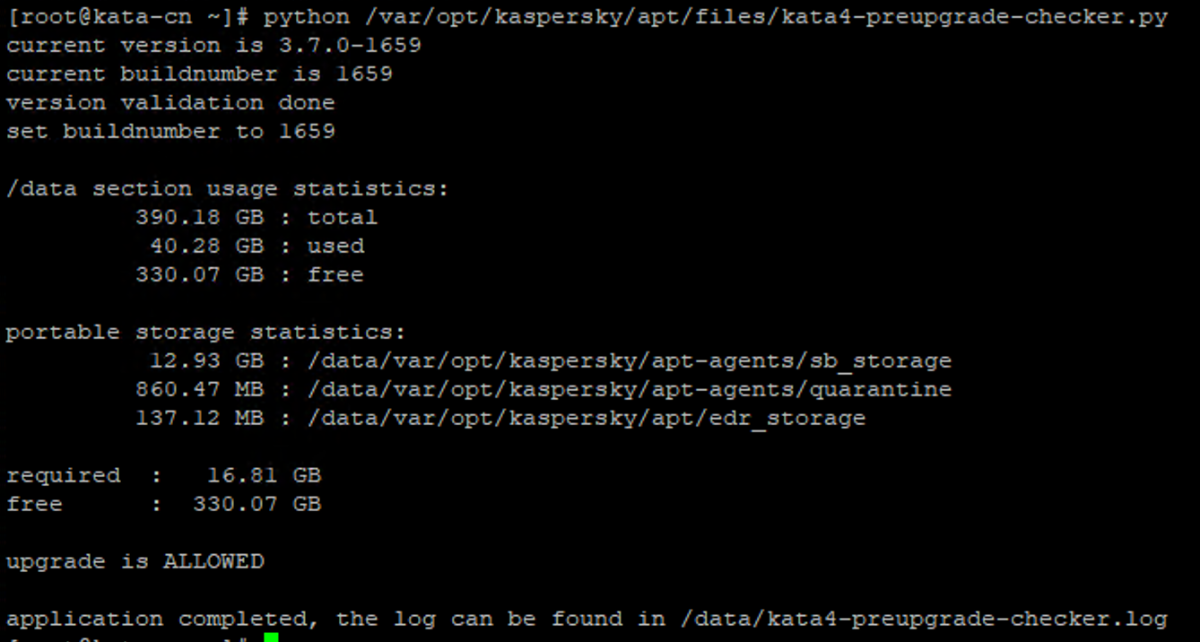
In case any issues arise, please contact Kaspersky support, and provide script output as shown on screenshot above and this script log, the script shows log location upon completion: /data/kata4-preupgrade-checker.log
Upgrade order
- Create backup of CN and do the manual backup of /var/opt/kaspersky/apt-preprocessor/preprocessor.conf (from CN and sensors, especially if tuning was made at sensors).
- Mount installation ISO to KATA VM or boot from drive with ISO, if a server is physical.
- Select Install Kaspersky Anti Targeted Attack Platform.
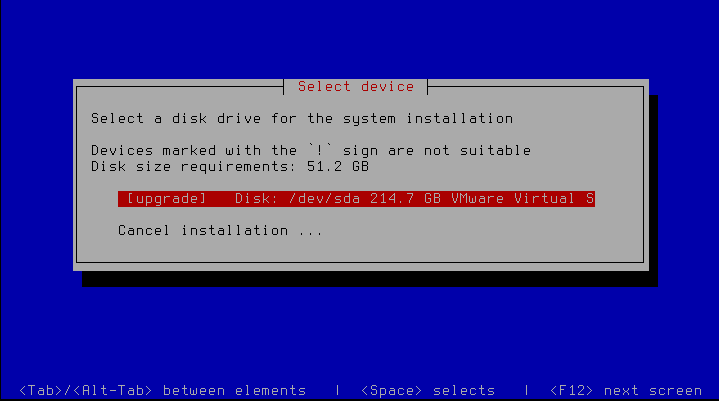
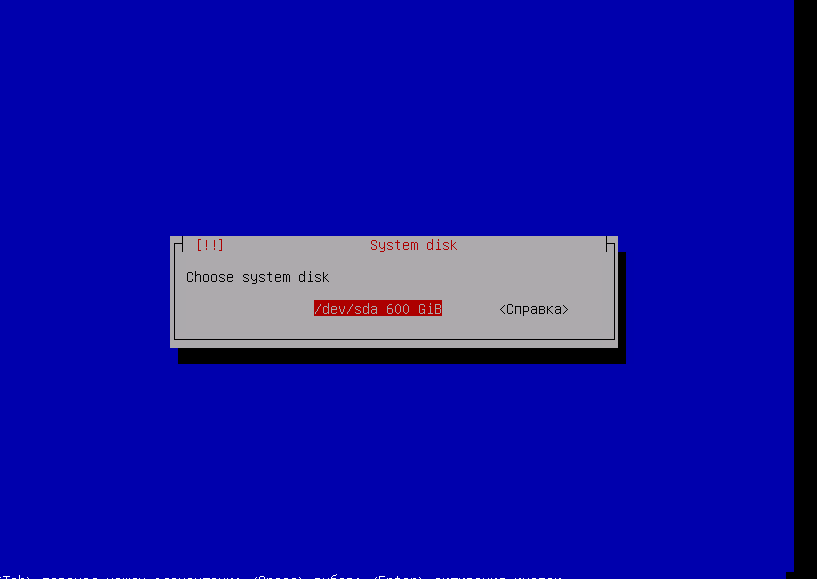
- Select Disk marked as [upgrade] and press Enter.
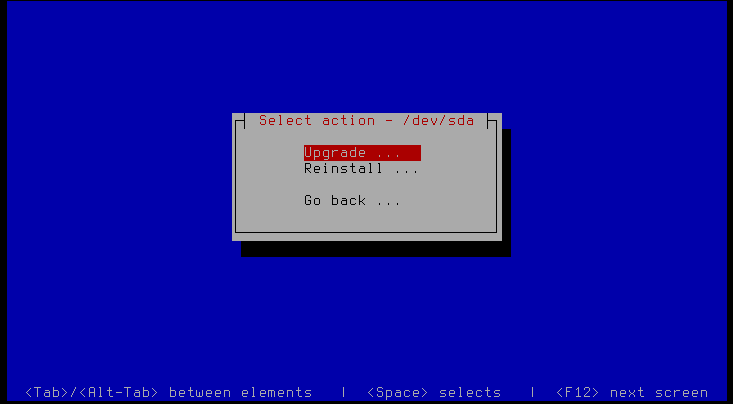
- Select Upgrade and press Enter
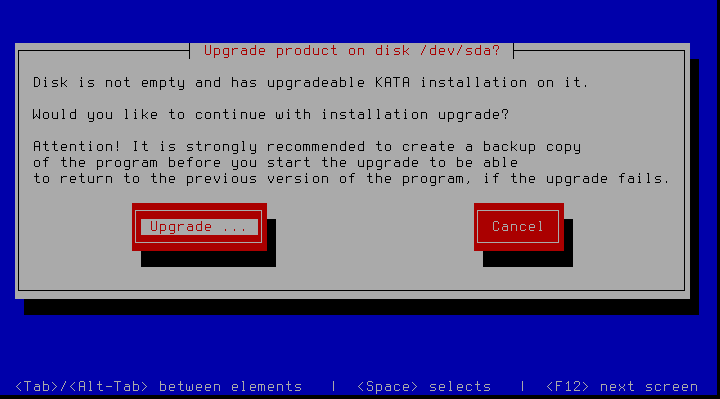
- Select Upgrade again and press Enter
-
Wait for the completion and check at WEB UI, that there are no errors / issues / etc.

Storage migration is a lengthy procedure and may take many hours, depending on the installation. No visual indication of progress is provided, but it's not frozen. - Perform a backup of 4.0
- The upgrade procedure from 4.0 up to 4.1 is pretty much the same, you have to map ISO and boot from it, select disk marked as [upgrade], proceed, make a backup of 4.1

Upgrade procedure from 4.1 to 5.0 is described here.
Before updating the product from version 4.1 to version 5.0, check which boot mode is used on the server (BIOS or UEFI). If UEFI is used, the update will fail. To avoid this, you need to update from a special KATA 5.0 image which can be provided by Kaspersky Support.
Before upgrade DISABLE NTP on 4.1
1) You can obtain file upgrade_preparation-1.0-py3-none-any.whl in kata-cn-5.0.0-5201-inst.x86_64_en-ru.iso, just mount it in Windows, go to support folder, copy this file and put it to /tmp via WinSCP to your KATA 4.1.

2) Proceed with steps described in Online help
- After mounting ISO and running from it you will be prompted to say y + ENTER to upgrade

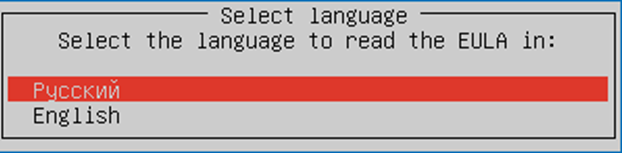
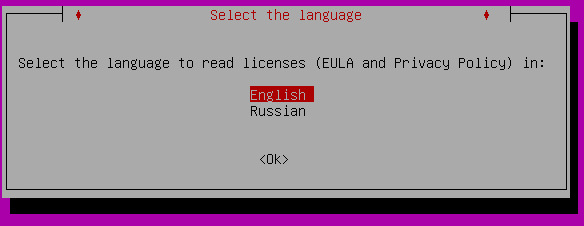
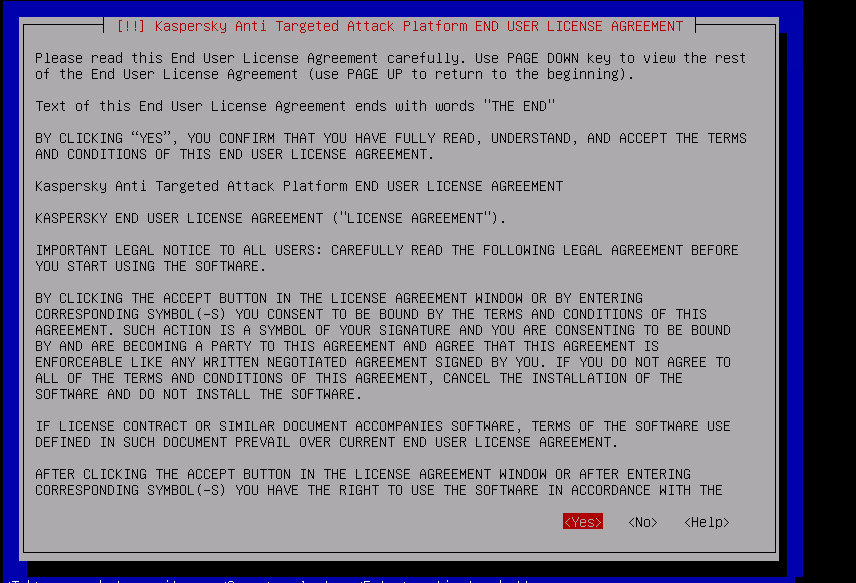
- Then press ENTER, read EULA and select "I accept"


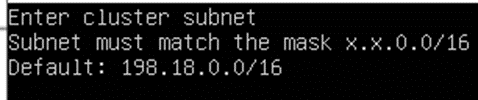
- Then you have two options: leave cluster and bridge/overlay subnets by default (just by pressing ENTER in windows below) or you can change them as you want (especially if these subnets crossover with your infrastructure subnets)

- Upgrade procedure can take a while, after that you'll be prompted to choose management interface, enter it's details again

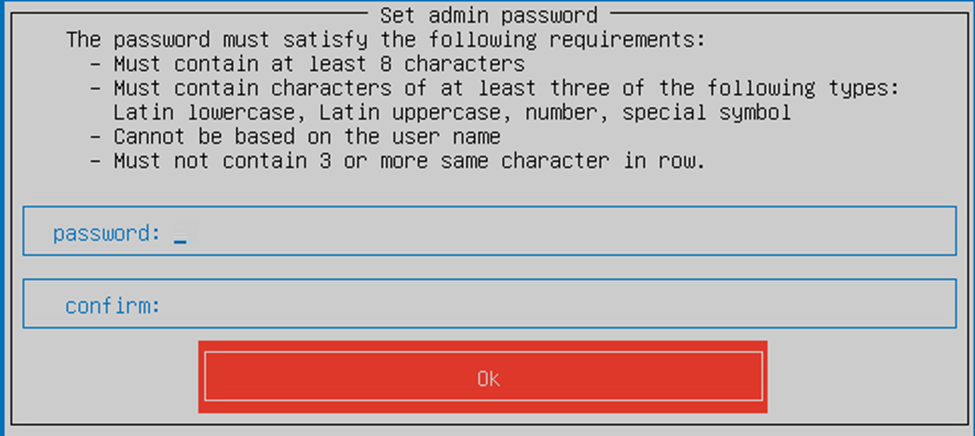
- Enter password for admin
- Configure DNS servers and press ENTER

- Enable SPAN capturing by typing y or skip this step as n and press ENTER (you can do it later after upgrade).

- Don't forget to read this article, kindly pay attention to section "Special considerations for upgrading Kaspersky Anti Targeted Attack Platform from version 4.1 to version 5.0"
- After upgrade you have to perform initial configuration of KATA via web interface using admin (with Local administrator checkbox) credentials being set up during upgrade, please refer to https://support.kaspersky.com/KATA/5.0/en-US/242580.htm and https://support.kaspersky.com/KATA/5.0/en-US/240726.htm
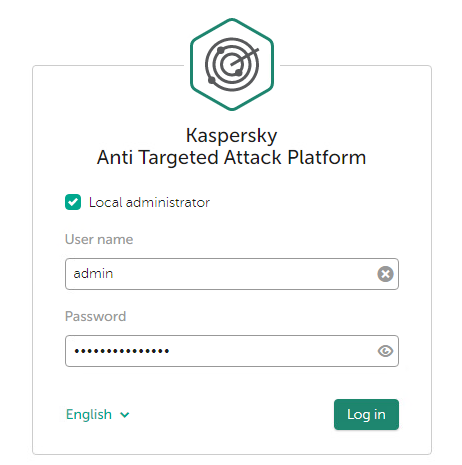
Once the configuration is completed, it's possible to log in to Web UI as regular local admin: use Administrator/Administrator login and password, "Local administrator" checkbox must be enabled, too. Change the password for Administrator user and proceed with adding license, creating users etc.
Upgrade procedure from 5.0 to 5.1 is described here.
- According to KB you have to upload upgrade.tar.gz to /data/upgrade
-
But first, you have to create this directory and set permissions to it to be able to upload upgrade package via WinSCP (in this example we use chmod 777 as an ultimate set of rights, you can use another set)
mkdir /data/upgradechmod777/data/upgrade -
After that upload upgrade.tar.gz to /data/upgrade via WinSCP and unarchive it
cd /data/upgradetar xvf upgrade.tar.gz -
Give executive permissions to script install_kata_upgrade.sh and install pre-upgrade package
-
Execute as root
chmod +x /data/upgrade/install_kata_upgrade.shsh install_kata_upgrade.shYou'll see this
-
And finally run upgrade (use admin user credentials which you use for ssh)
kata-upgrade --data-dir /data/upgrade --user admin --password'passw@rd' -
In a while you should receive message about successful upgrade .


Upgrade procedure from 5.1 Ubuntu to 6.0 Ubuntu is described HERE
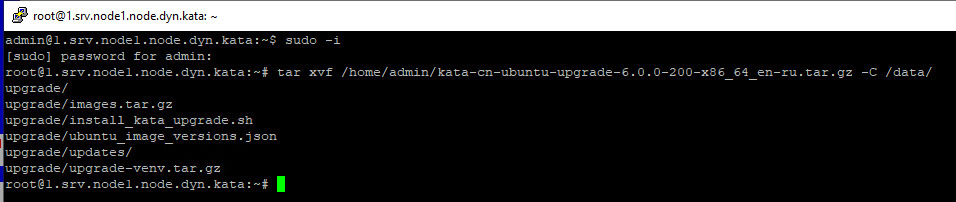
- Upload kata-cn-ubuntu-upgrade-6.0.0-200-x86_64_en-ru.tar.gz via WinSCP to /home/admin
- Unpack it to /data by command
tar xvf /home/admin/kata-cn-ubuntu-upgrade-6.0.0-200-x86_64_en-ru.tar.gz -C /data/
|
- Install the upgrade package by running the following commands
cd /data/upgrade/
chmod +x ./install_kata_upgrade.sh
./install_kata_upgrade.sh
|

- Install the upgrade by running the following commands
source /tmp/upgrade-venv/venv/bin/activate
kata-upgrade --data-dir /data/upgrade/ --password <password specified during component installation>
|
If the password contains special characters, the password variable must be specified in the following format: --password '<password>'
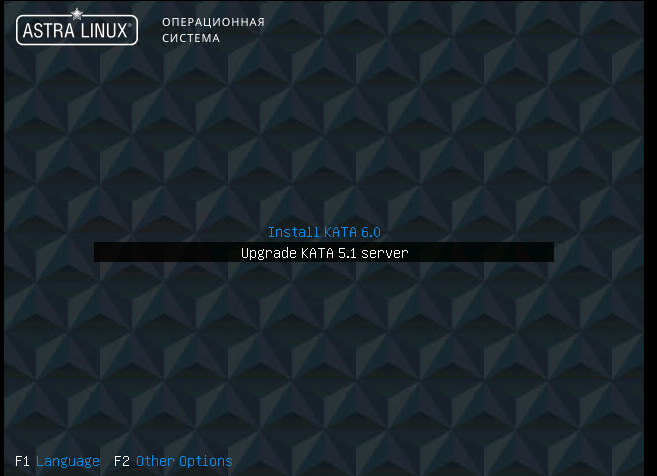
- Mount the iso image of Kaspersky Anti Targeted Attack Platform version 6.0 and restart the server

- In the GRUB menu, select Upgrade KATA 5.1

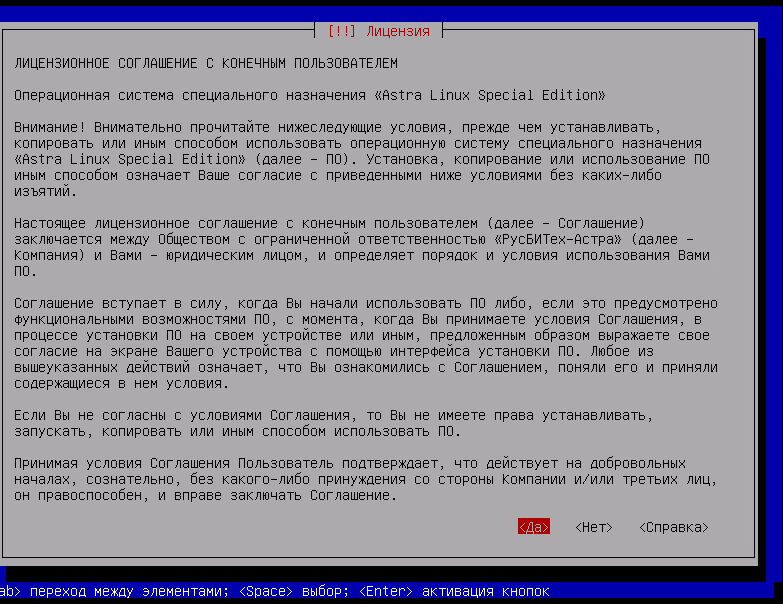
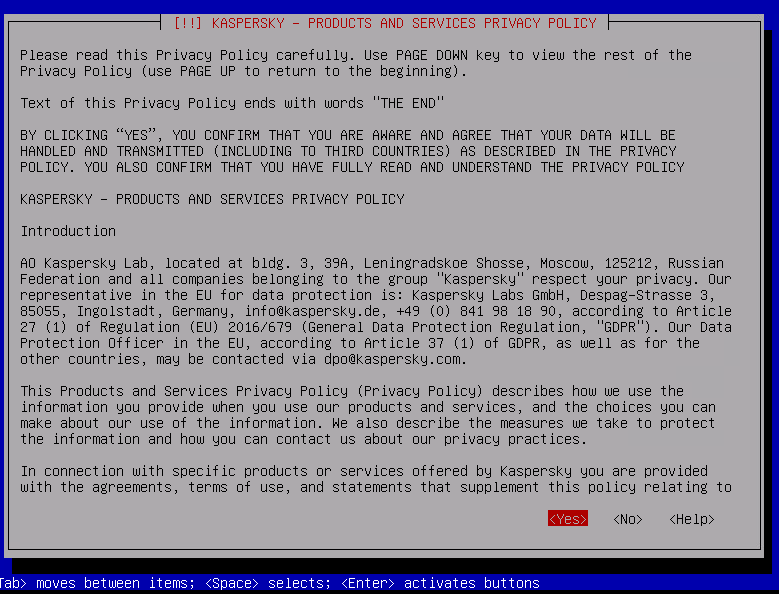
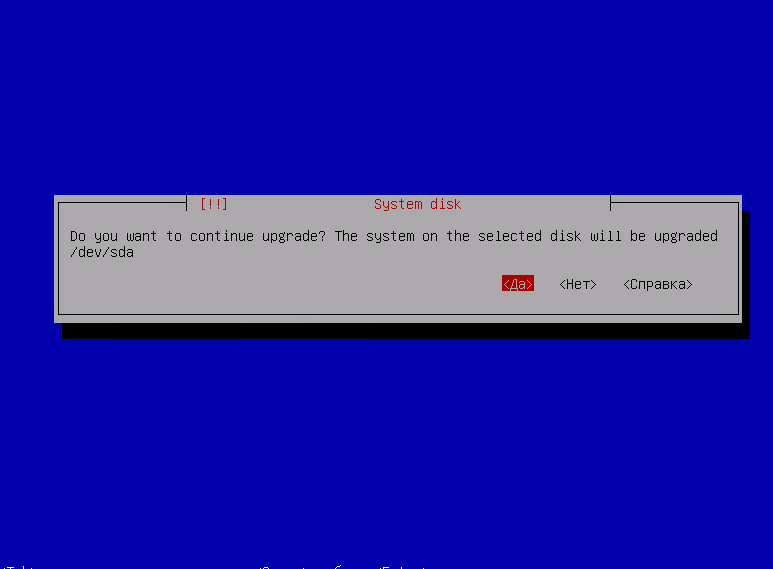
- Accept EULA
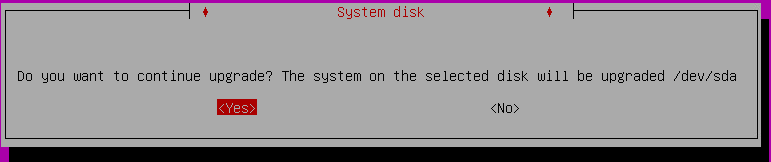
- Confirm upgrade
- Wait for completion, don't forget to remove ISO or ensure that after reboot KATA boots from local disk. Done.
Known problem: during upgrade to 6.0 upgrade script may fail
With the following error:
2024-10-21 10:56:16,664.664 [kata_upgrade.tasks.upgrade_base_task][ERROR] Upgrade task " (UpdateDeploymentServices)" completed with an error, elapsed time: 191.07 sec
Traceback (most recent call last):
  File "/tmp/upgrade-venv/venv/lib/python3.11/site-packages/etcd3/client.py", line 46, in handler
    return f(*args, **kwargs)
           ^^^^^^^^^^^^^^^^^^
  File "/tmp/upgrade-venv/venv/lib/python3.11/site-packages/etcd3/client.py", line 257, in get_response
    return self.kvstub.Range(
           ^^^^^^^^^^^^^^^^^^
  File "/tmp/upgrade-venv/venv/lib/python3.11/site-packages/grpc/_channel.py", line 1161, in __call__
    return _end_unary_response_blocking(state, call, False, None)
           ^^^^^^^^^^^^^^^^^^^^^^^^^^^^^^^^^^^^^^^^^^^^^^^^^^^^^^
  File "/tmp/upgrade-venv/venv/lib/python3.11/site-packages/grpc/_channel.py", line 1004, in _end_unary_response_blocking
    raise _InactiveRpcError(state)  # pytype: disable=not-instantiable
    ^^^^^^^^^^^^^^^^^^^^^^^^^^^^^^
grpc._channel._InactiveRpcError: <_InactiveRpcError of RPC that terminated with:
        status = StatusCode.UNAVAILABLE
        details = "DNS resolution failed for etcd.dyn.kata:2379: C-ares status is not ARES_SUCCESS qtype=A name=etcd.dyn.kata is_balancer=0: Timeout while contacting DNS servers"
        debug_error_string = "UNKNOWN:DNS resolution failed for etcd.dyn.kata:2379: C-ares status is not ARES_SUCCESS qtype=A name=etcd.dyn.kata is_balancer=0: Timeout while contacting DNS servers {grpc_status:14, created_time:"2024-10-21T10:56:16.663456976+00:00"}"
>
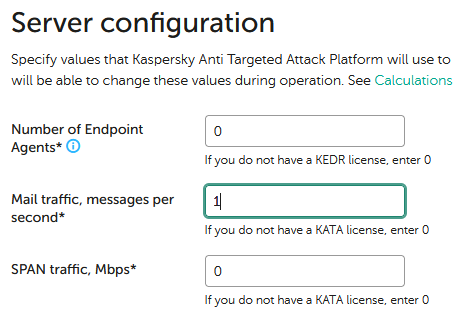
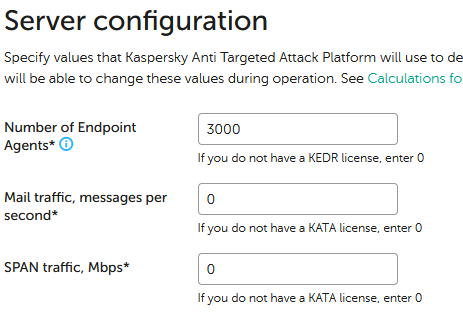
After which web interface is not be accessible with Administrator credentials.

Solution:
Login to web interface using admin credentials (not Administrator)
If current sizing by Endpoint Agents is not 0 then remember current value and set it to 0.
If this setting cannot be applied because there are 0s for other integrations then set mail to 1.
For example:

Would be changed to

Apply this configuration, login back with admin credentials and configure original values back:
The point is to zero out any single of the integrations and then configure it back to original value, so depending on original configuration you may need to zero out other integration instead of Endpoint Agents.
After this login to web interface with Administrator should work. Do that and wait till all errors in dashboard are cleared.
Now you can restart upgrade script from step 5:
sudo -i
cd /data/upgrade/
./install_kata_upgrade.sh
source /tmp/upgrade-venv/venv/bin/activate
kata-upgrade --data-dir /data/upgrade/ --password ... --current-task-index 5
Known problem: during upgrade to 6.0 when booting to iso an error is displayed:
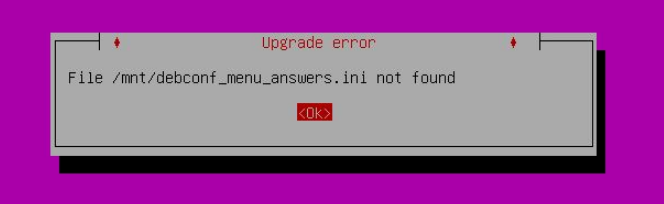
File /mnt/debconf_menu_answers.ini not found
Possible causes:
- Upgrade script that was running before reboot did not finish successfully.
Check logs in /var/log/kaspersky/installation/. It is safe to boot not from iso at this point to check that log.
In case script failed (but not like above) escalate incident.
- Wrong partitioning of /dev/sda, where there is sda4 instead of sda3.
Check output of lsblk -o NAME /dev/sda
Correct output:
# lsblk -o NAME /dev/sda
NAME
sda
├─sda1
├─sda2
└─sda3
Wrong output:
# lsblk -o NAME /dev/sda
NAME
sda
├─sda1
├─sda2
└─sda4
Solution:
$ sudo -i
1) Create partition table backup
# sfdisk -d /dev/sda > sda.bkp
# cp sda.bkp sda.new
2) Edit partition table file
# vi sda.new
3) Enter edit mode by pressing "i" and change /dev/sda4 to /dev/sda3
For example if you have

Change the number 4 to 3. Nothing else should be changed in the file!

To save press ESC then :wq! and Enter.
Apply new partition table
# sfdisk --no-reread -f /dev/sda < sda.new
Now you can boot from iso and continue upgrade.
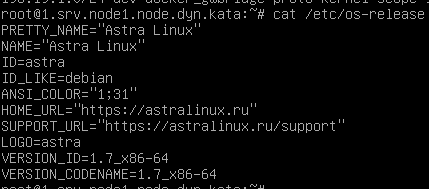
Upgrade procedure from 5.1 Ubuntu to 6.0 Astra is described below
Installation is described here https://support.kaspersky.ru/KATA/6.0/en-US/243480.htm
But, we have some differences here
- Upload kata-cn-astra-upgrade-6.0.0-200-x86_64_en-ru.tar.gz to /data
- Then move to *****@*****.tld:~# cd /data
-
Execute
tar xvf /data/kata-cn-astra-upgrade-6.0.0-200-x86_64_en-ru.tar.gz -C /data/
-
Execute
cd /data/upgrade/

chmod +x ./install_kata_upgrade.sh

source /tmp/upgrade-venv/venv/bin/activate

kata-upgrade --data-dir /data/upgrade/ --password <password of the 'admin' user>
- Mount the iso image of Kaspersky Anti Targeted Attack Platform version 6.0 and restart the server.
- You have to start server from mounted ISO and select "Upgrade KATA 5.1 server"
- Proceed

- That's it, you've upgraded your 5.1 Ubuntu to 6.0 Astra
Upgrade procedure from 6.0 to 6.1 is below
https://support.kaspersky.com/help/KATA/6.1/en-US/246850.htm
It considers upgrade from 6.0 or 6.0.1 directly to 6.0.2 - https://support.kaspersky.com/KATA/6.0/en-US/271957.htm, to 6.0.3, and finally to 6.1 - https://support.kaspersky.com/help/KATA/6.1/en-US/243480.htm
6.0 > 6.0.1
- Upload upgrade.tar.gz to /home/admin directory
-
Execute following commands below
root@1.srv.node1.node.dyn.kata:~# mv /home/admin/upgrade.tar.gz /data/root@1.srv.node1.node.dyn.kata:~# tar xvf /data/upgrade.tar.gz -C /data/upgrade/upgrade/images.tar.gzupgrade/install_kata_upgrade.shupgrade/kata_license-1.0-py3-none-any.whlupgrade/kata_upgrade-1.0-py3-none-any.whlupgrade/ubuntu_image_versions.jsonupgrade/updates/upgrade/updates/Packages.gzupgrade/updates/glibc_2.35-0ubuntu3.6.debian.tar.xzupgrade/updates/glibc_2.35-0ubuntu3.6.dscupgrade/updates/glibc_2.35.orig.tar.xzupgrade/updates/glibc_2.35.orig.tar.xz.ascupgrade/updates/libc-bin_2.35-0ubuntu3.6_amd64.debupgrade/updates/libc-dev-bin_2.35-0ubuntu3.6_amd64.debupgrade/updates/libc-devtools_2.35-0ubuntu3.6_amd64.debupgrade/updates/libc6-dev_2.35-0ubuntu3.6_amd64.debupgrade/updates/libc6_2.35-0ubuntu3.6_amd64.debroot@1.srv.node1.node.dyn.kata:~# cd /data/upgrade/root@1.srv.node1.node.dyn.kata:/data/upgrade# chmod +x ./install_kata_upgrade.shroot@1.srv.node1.node.dyn.kata:/data/upgrade# ./install_kata_upgrade.shProcessing ./kata_license-1.0-py3-none-any.whlInstalling collected packages: kata-licenseAttempting uninstall: kata-licenseFound existing installation: kata-license1.0Uninstalling kata-license-1.0:Successfully uninstalled kata-license-1.0Successfully installed kata-license-1.0WARNING: There was an error checking the latest version of pip.Processing ./kata_upgrade-1.0-py3-none-any.whlInstalling collected packages: kata-upgradeSuccessfully installed kata-upgrade-1.0WARNING: There was an error checking the latest version of pip.Installation was successful! -
Then execute and wait until completion
kata-upgrade --data-dir /data/upgrade/ --password <password of the'admin'user> <<<<<<<< use' 'symbolsifspecial symbols are presented in password............................................................................................................................................................2024-09-1015:46:02,038.38[kata_upgrade.context.ssh_execution_context][INFO] manager.cluster.dyn.kata: Closed ssh session2024-09-1015:46:02,038.38[kata_upgrade.tasks.upgrade_base_task][INFO] Upgrade task"Update product stack sizing via management api (UpdateSizing)"completed successfully, elapsed time:896.77sec2024-09-1015:46:02,039.39[kata_upgrade.updater.updater][INFO] WARNING: Please close all current user sessions to complete the upgrade process. -
Patch 6.0.1 is installed, you can check it at web UI
6.0.1 > 6.0.2
- Upload kata-cn-upgrade-6.0.2-x86_64_en-ru.tar.gz to /home/admin directory
-
Execute following commands below
root@1.srv.node1.node.dyn.kata:/data/upgrade# mv /home/admin/kata-cn-upgrade-6.0.2-x86_64_en-ru.tar.gz /data/root@1.srv.node1.node.dyn.kata:/data/upgrade# tar xvf /data/kata-cn-upgrade-6.0.2-x86_64_en-ru.tar.gz -C /data/upgrade/upgrade/images.tar.gzupgrade/install_kata_upgrade.shupgrade/kata_license-1.0-py3-none-any.whlupgrade/kata_upgrade-1.0-py3-none-any.whlupgrade/ubuntu_image_versions.jsonupgrade/updates/upgrade/updates/Packages.gzupgrade/updates/glibc_2.35-0ubuntu3.6.debian.tar.xzupgrade/updates/glibc_2.35-0ubuntu3.6.dscupgrade/updates/glibc_2.35.orig.tar.xzupgrade/updates/glibc_2.35.orig.tar.xz.ascupgrade/updates/libc-bin_2.35-0ubuntu3.6_amd64.debupgrade/updates/libc-dev-bin_2.35-0ubuntu3.6_amd64.debupgrade/updates/libc-devtools_2.35-0ubuntu3.6_amd64.debupgrade/updates/libc6-dev_2.35-0ubuntu3.6_amd64.debupgrade/updates/libc6_2.35-0ubuntu3.6_amd64.debroot@1.srv.node1.node.dyn.kata:/data/upgrade# cd /data/upgrade/root@1.srv.node1.node.dyn.kata:/data/upgrade# chmod +x ./install_kata_upgrade.shroot@1.srv.node1.node.dyn.kata:/data/upgrade# ./install_kata_upgrade.shProcessing ./kata_license-1.0-py3-none-any.whlInstalling collected packages: kata-licenseAttempting uninstall: kata-licenseFound existing installation: kata-license1.0Uninstalling kata-license-1.0:Successfully uninstalled kata-license-1.0Successfully installed kata-license-1.0WARNING: There was an error checking the latest version of pip.Processing ./kata_upgrade-1.0-py3-none-any.whlInstalling collected packages: kata-upgradeAttempting uninstall: kata-upgradeFound existing installation: kata-upgrade1.0Uninstalling kata-upgrade-1.0:Successfully uninstalled kata-upgrade-1.0Successfully installed kata-upgrade-1.0WARNING: There was an error checking the latest version of pip.Installation was successful! -
Then execute and wait until completion
kata-upgrade --data-dir /data/upgrade/ --password <password of the'admin'user> <<<<<<<< use' 'symbolsifspecial symbols are presented in password............................................................................................................................................................2024-09-1016:47:24,839.839[kata_upgrade.context.ssh_execution_context][INFO] manager.cluster.dyn.kata: Closed ssh session2024-09-1016:47:24,839.839[kata_upgrade.tasks.upgrade_base_task][INFO] Upgrade task"Update product stack sizing via management api (UpdateSizing)"completed successfully, elapsed time:902.25sec2024-09-1016:47:24,840.840[kata_upgrade.updater.updater][INFO] WARNING: Please close all current user sessions to complete the upgrade process. -
Patch 6.0.2 is installed, you can check it at web UI

6.0.2 > 6.0.3 https://support.kaspersky.com/KATA/6.0/en-US/286625.htm
- Upload kata-cn-upgrade-6.0.3.sh to /home/admin
-
Execute following commands below
root@1.srv.node1.node.dyn.kata:/data/upgrade# chmod +x /home/admin/kata-cn-upgrade-6.0.3.shroot@1.srv.node1.node.dyn.kata:/data/upgrade# cd /home/admin/root@1.srv.node1.node.dyn.kata:/home/admin# sh kata-cn-upgrade-6.0.3.sh -
Check that there are no errors like this
root@1.srv.node1.node.dyn.kata:/home/admin# cat /tmp/ks_check_klava_patch.logbeforetotal1016-rwxr-xr-x1root root561Nov152023check_aapt-rwxr-xr-x1root root306Nov162023check_aptfr-rwxr-xr-x1root root1592Nov152023check_aptfs-rwxr-xr-x1root root1860Nov152023check_aptsn-rwxr-xr-x1kluser klusers1011432Oct202023check_hips2-rwxr-xr-x1root root287Nov162023check_ksn-rwxr-xr-x1root root409Nov152023dispatcher-rwxr-xr-x1root root1315Nov162023validate_ioa_rulesaftertotal1016-rwxr-xr-x1root root561Nov152023check_aapt-rwxr-xr-x1root root306Nov162023check_aptfr-rwxr-xr-x1root root1592Nov152023check_aptfs-rwxr-xr-x1root root1860Nov152023check_aptsn-rwxr-xr-x1kluser klusers1011432Oct202023check_hips2lrwxrwxrwx1root root50Sep1016:56check_klava -> /opt/kaspersky/apt-scan-server/libexec/check_klava-rwxr-xr-x1root root287Nov162023check_ksn-rwxr-xr-x1root root409Nov152023dispatcher-rwxr-xr-x1root root1315Nov162023validate_ioa_rules - Patch 6.0.3 is installed, it doesn't change version of product at web UI
6.0.3 > 6.1
Please follow https://support.kaspersky.com/help/KATA/6.1/en-US/243480.htm
Known problem: after upgrade to 6.1 kata-collect is not found
This is related not only to kata-collect console utility but also other internal console utilities
Solution:
$ sudo -i
Edit /etc/bash.bashrc file
# vi /etc/bash.bashrc
Enter edit mode by pressing "i" and insert the following line in the very beginning:
source /opt/venv/bin/activate
Like so:
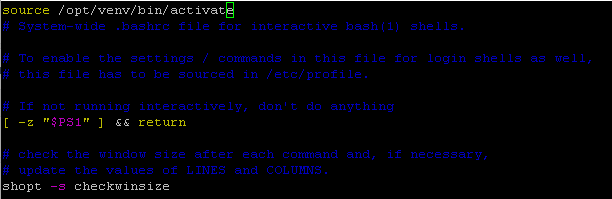
To save press ESC then :wq! and Enter.
After that reconnect to server via SSH.
Known problem: no space on / at 6.1 sensor nodes after installation
Cause: If you do not select any network interface as SPAN then suricata crashes constantly generating core files.
To prevent this select at least one network interface for SPAN on sensor nodes.
Solution if the problem already occured:
- Reinstall.
- Select at least one network interface for SPAN (Program settings → Configure traffic capture → Setup capture interfaces → Mark at least one network interface)
If reinstallation is difficult and / is already full and you cannot get into preprocessor_span container to check its / content then:
- Select at least one network interface for SPAN.
- Change dir to docker container MergedDir
*****@*****.tldr:~# cd $(docker inspect $(docker ps | grep preprocessor_span | awk '{print $1}') | grep Merged | awk -F\" '{print $4}')
*****@*****.tldr:/var/lib/docker/overlay2/c3028dde07229aa8fc6f37b7ac2e04b454765b1b015ec9303ac1a35c38ffda38/merged#
- Check listing, it should contain a lot of core files
*****@*****.tldr:/var/lib/docker/overlay2/c3028dde07229aa8fc6f37b7ac2e04b454765b1b015ec9303ac1a35c38ffda38/merged# ls -la | head -20
total 60596
drwxr-xr-x 2 root   root     4096 May 18 09:36
drwxr-xr-x 1 root   root     4096 Oct 24 11:12 .
drwx--x--- 5 root   root     4096 Oct 22 14:21 ..
drwxr-xr-x 1 root   root     4096 Oct 22 14:58 application
lrwxrwxrwx 1 root   root        7 Apr 25  2023 bin -> usr/bin
drwxr-xr-x 2 root   root     4096 Apr 18  2022 boot
-rw------- 1 root   root 11939840 Oct 24 11:10 core.103983
-rw------- 1 root   root 11939840 Oct 24 11:10 core.103985
-rw------- 1 root   root 11939840 Oct 24 11:10 core.103987
-rw------- 1 root   root 11939840 Oct 24 11:10 core.103989
-rw------- 1 root   root 11939840 Oct 24 11:10 core.103991
-rw------- 1 root   root 11939840 Oct 24 11:10 core.103993
-rw------- 1 root   root 11939840 Oct 24 11:10 core.104001
-rw------- 1 root   root 11939840 Oct 24 11:10 core.104008
-rw------- 1 root   root 11939840 Oct 24 11:10 core.104010
-rw------- 1 root   root 11939840 Oct 24 11:10 core.104017
-rw------- 1 root   root 11939840 Oct 24 11:10 core.104025
-rw------- 1 root   root 11939840 Oct 24 11:11 core.104027
-rw------- 1 root   root 11939840 Oct 24 11:11 core.104033
- Remove them like so (make sure no unnecessary spaces are in the rm command)
*****@*****.tldr:/var/lib/docker/overlay2/c3028dde07229aa8fc6f37b7ac2e04b454765b1b015ec9303ac1a35c38ffda38/merged# rm -f ./core.[0-9]*
- Reboot


0 Comments
Recommended Comments
There are no comments to display.
Please sign in to comment
You will be able to leave a comment after signing in
Sign In Now